
Creating an Assessment
On this page
You can build a test from new questions, from questions you or other teachers have already written, or from a mix of both. If you already have the test on paper or in a Word or PDF file, Quick Key is faster.
1. Start a new assessment
- Click Assessments in the top menu.
- Hover over Create ▼ and choose New Assessment.
The first time you open this page, a short tour points out each part.
2. Enter the test information
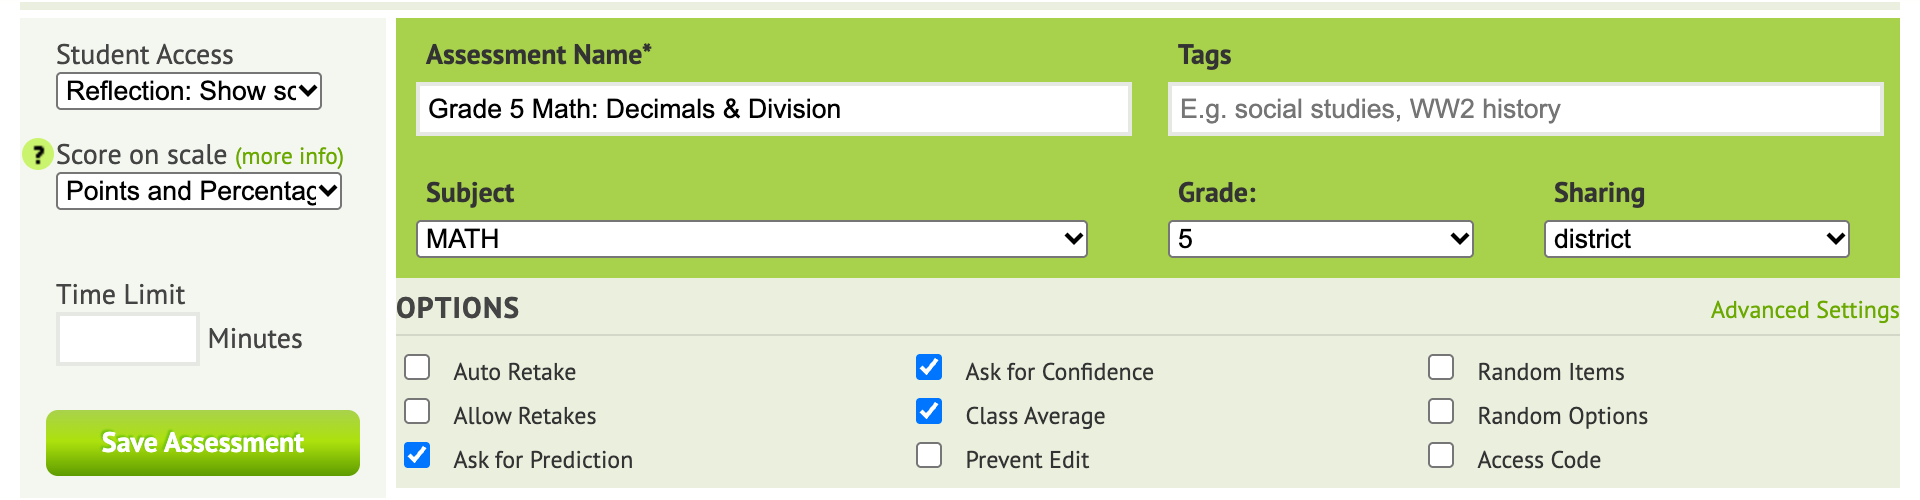
- Assessment Name (required). Students see this name.
- Subject, Grade and Sharing (optional). Sharing controls who else can find and use your test: Just Me, School, District or World.
- Tags (optional). Keywords such as
unit 3orfractionsmake the test easier to find later.
3. Add items
Each question on a Naiku test is an item. You can add them two ways:
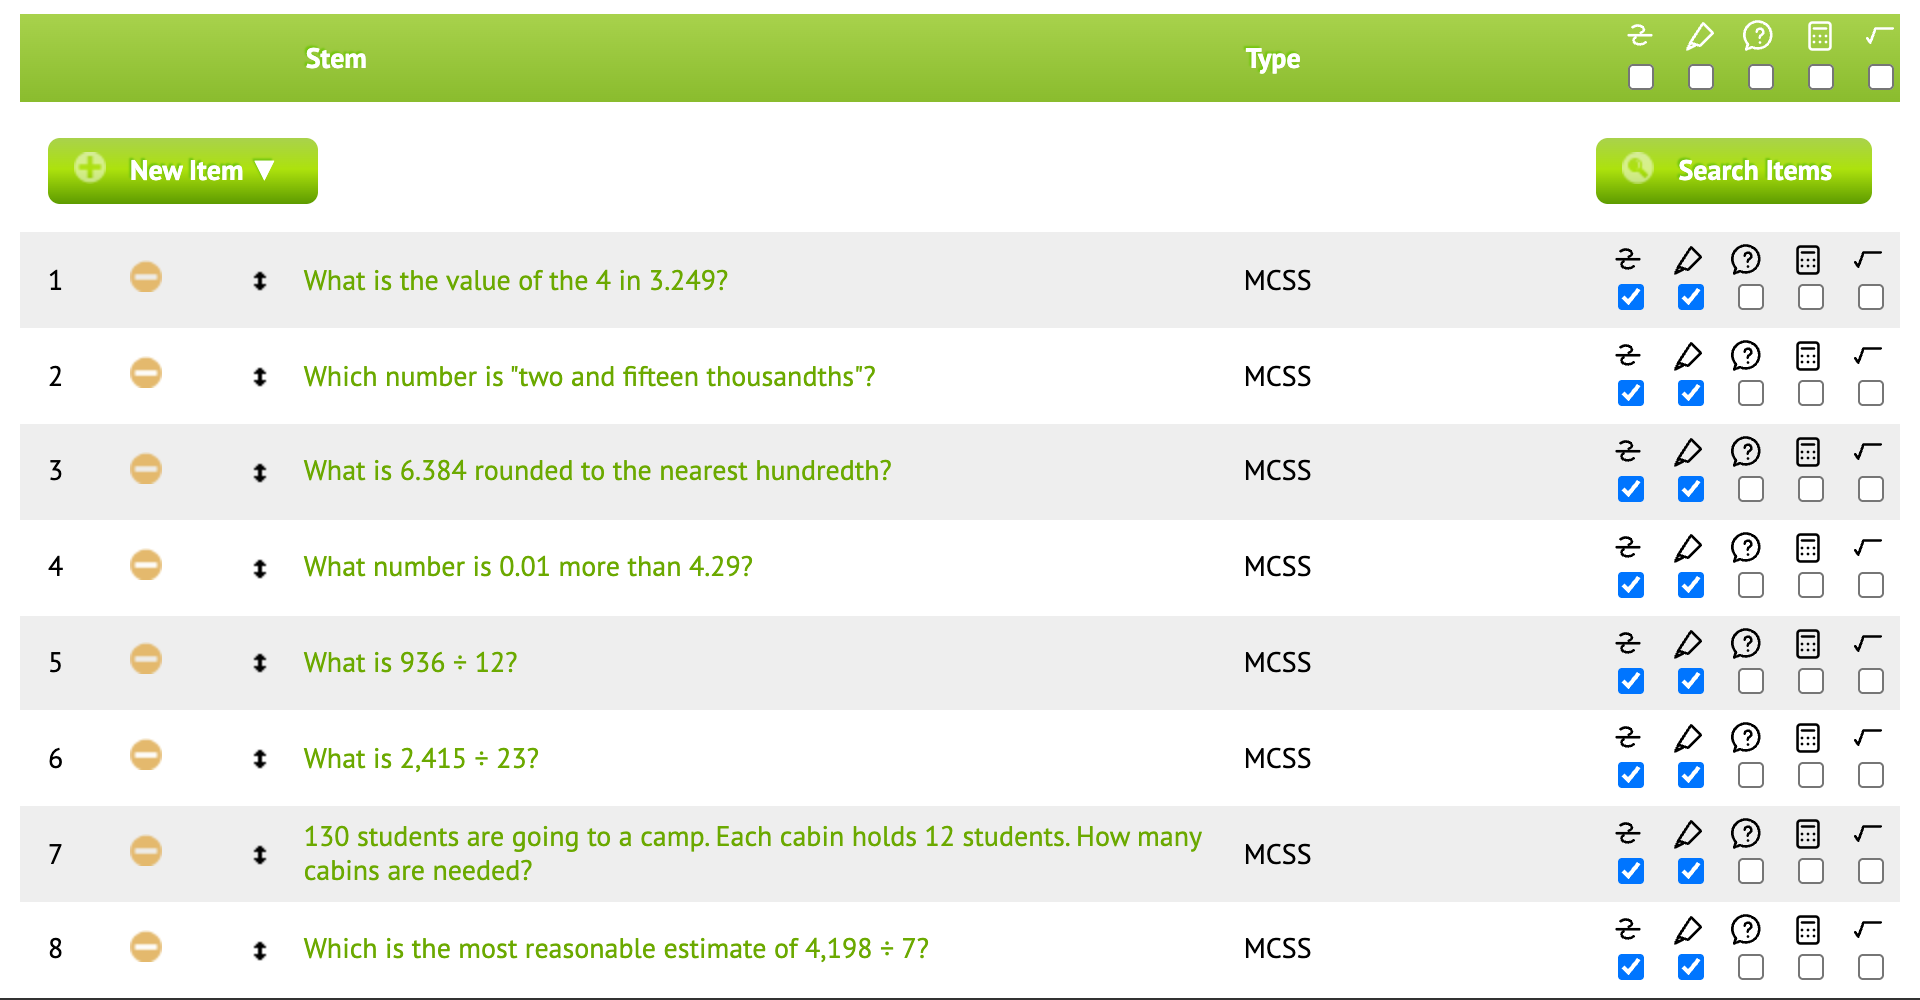
- New Item ▼ creates a new item. Pick the type: Multiple Choice, Constructed Response, True / False, Multiple Response, Matching, Passage with Sub-items, Essay, Multiple Yes/No, Ordered, Multi-part with Sub-items or Algorithmic. When you save the item, it’s added to your test.
- Search Items finds existing items, your own, ones shared by other teachers, and any item bank your school subscribes to. See Searching for Items.
The items appear in a table in test order. Drag an item to move it.
The icons across the top of the table turn on a student tool for every item at once: choice eliminator, highlighter, Tell-Me-More, basic calculator and scientific calculator (and the Desmos graphing calculator, if your school has it). You can also set these per item.
4. Set the options
Under Options, tick what you need, for example:
- Random Items shuffles the item order for each student.
- Random Options shuffles the answer choices for each student.
- Access Code makes students enter the test’s code before they start. See Test Security and Academic Honesty.
- Ask for Confidence and Ask for Prediction ask students how sure they are. See Confidence and Reflection.
- Allow Retakes lets students retake the test after they see their results.
Advanced Settings has start and close times, a time limit, what students see after the test (Student Access) and more. See Assessment Options for the full list.
5. Save
Click Save Assessment. Your test opens, ready to preview and assign:
- Actions ▼ → Preview lets you take the test as a student would. See Preview an Assessment.
- Actions ▼ → Assign gives it to one or more classes. See Assign the Assessment to a Class.
To change the test later, open it and choose Actions ▼ → Edit.
Print a test
Open the test and choose Actions ▼ → Print:
- Assessment for Student prints a clean copy to hand out.
- Assessment for Teacher prints a copy with the answer key.
Need to reuse or remove a test? See Copy, Archive or Delete a Test.